All About Hammers
Stay away from a hammer that’s too small or too large. The little ones make you work too hard, and the big one are impossible to deal with. Pick up a few hammers and chose one hat makes you feel comfortable. The standard hammer head is 4.5 inches from front to claw. The standard hammer length, including the head, is 1 foot. Handles come in wood and metal. Choose whatever feels best for you, but make sure the handle is solid. Hollow handles tend to break.
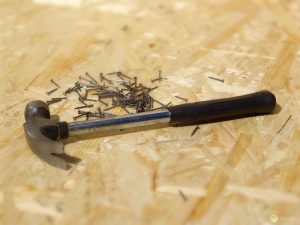 Also make sure the hammer head is attached tightly to the handle. A flying hammer head is a dangerous thing. There are various kinds of hammers for different jobs. For our tool kit you’ll want a curved claw hammer, meaning the two prongs in the back of the hammer’s head are curved for removing nails.
How to hammer a nail
Use a pencil to lightly mark the spot where you want the nail to go. Before anything else, do your best to make sure you are driving the nail into a material that will accommodate a nail of its type or any nail at all. This is particularly important when you are hammering something into a wall.
There may be a thin layer of Sheetrock that the nail won’t hold in, or a brick wall behind the plaster that the nail will bounce out of. A nail should be held between the thumb and the index finger at a 90-degree angle to the surface you are working with. If you’re right-handed, hammer with the right. Left-handed, go with that.
If you swing both ways, as they say, choose the hand that is most comfortable for the job. Keep your wrist firm, and drive the hammer with your forearm. Hold the nail against the desired spot and tap the nail head lightly with the hammer, making sure you drive the nail perpendicular to the material you are nailing into.
When you feel comfortable that the nail has gone in straight and true, tap more firmly until you’ve driven the nail in. Don’t swing the hammer with too much force. Instead, concentrate on hitting the nail firmly and driving tit straight down into whatever you are nailing. Be especially careful to have a light hand when you get to the end of the job, just before the nail disappears into the wood.. If you bang too heavily at this stage, then you will damage the surface you are working with.
Trick of the trade: There are two techniques you might consider when hammering in a nail. First, hold the nail with a pair of pliers instead of with  your hand for greater control and confidence. Second, lay an index card down on the surface and push the nail through that first, as a way of stabilizing the nail and preventing surface damage.
What do I do about a nail that’s gone off-kilter?
Okay, here’s he scoop: even the most skilled woodworker is going to end up with some crooked nails. The best way to prevent this is to concentrate on hammering the nail in perpendicular to the wood. One way you can do that is by making sure you’ve used the proper grip on the hammer, as described up above, and if you are hammering a nail downward, that you are keeping the handle of the hammer pointed at your hips as you work.
But you’ll make mistakes. It happens, and when it does, start over. The worst thins you can do is try to toggle the nail around in the hole, hoping that this will straighten it out. It won’t. Remember, when you hammered in that nail, you create a channel in the wood, and if that channel is on an angle, there is nothing you can do to make it right. All you will get for your effort is a big, misshapen nail hole in eh wood. Yank that nail out with the claw of your hammer and start over.
Special thanks to Stephen Fanuka & Edward Lewine for their help with these tips.
Alan Soucy administrator
About the author